Wednesday, December 22, 2010

Layered Peppermint Crunch Bark

Peppermint bark

I have said it before, but I love that my printed internet recipes are dated because it helps me remember the circumstances when I first came across them…this one is from December 13, 2000! 

I was living in the Phi Mu house and probably in the chapter room studying for finals.  One of the girls was in the kitchen making this recipe for a gift and I was totally enthralled!  I wasn’t a cook at this time (that didn’t happen until I made the switch from a being a pre-med major to dietetics…2 years later).  But I was amazed that she was making her own peppermint bark!  Who does that?  Didn’t everyone just buy it from the store?

So after finals were over and I was back in Covington for the 5 WEEK BREAK (boy do I miss that!!), I made the bark with my mom (I miss cooking with her too).  It is the best peppermint bark I have ever tried.  Hands down.

Peppermint Bark 2 

The recipe is sort of a process.  But, back then I wasn’t the “experienced” cook I am now.  This time around was much easier.  I melted the chocolate in the microwave…no double boiler needed.  I omitted some of the cream to make the dark chocolate layer a little firmer.  I added the peppermint powder* from the crushed candy canes to the first white chocolate layer.  And I didn’t use the back of a sheet pan…I used the inside. 

The stickers on the gift bags were a Christmas present from “Santa Mel”.  I love them and need to use them more often.  Every year I hesitate to give unhealthy food gifts…not because I think you shouldn’t eat them, but because I figure most people already get enough of them and I (the dietitian) don’t need to add insult to injury.  I’d rather do a healthier food gift.  But not this year!

It cracks me up that on the margin of the recipe I calculated the calories and total fat.  Back then I didn’t have access to to recipe analyzer I use now…so I had to use good old fashioned math.  I won’t tell you the numbers, no need to feel guilty around the holidays!

Layered Peppermint Crunch Bark
adapted from Epicurious.com

This is doubled from the original…you might as well too!  It fits in a half sheet pan (13X18) perfectly.

34 ounces (around 2 pounds) good-quality white chocolate (I used Callebaut from Whole Foods…they conveniently sell 8ish oz bars of bulk chocolate), finely chopped, DIVIDED
20 regular sized candy canes (about 10 ounces) coarsely crushed*
16 ounces (around 1 pound) bittersweet or semisweet chocolate(not unsweetened; again I got this in bulk at WF), chopped
1/2 cup (8 tablespoons) whipping cream 
1 teaspoon peppermint extract

Line a half sheet pan securely with foil.

Melt half of the white chocolate in a microwave safe bowl for 1 minute at 50% power.  Stir white chocolate and continue heating at 30 second intervals at 50% power (stirring each time) until smooth (avoid getting any water in the bowl and don’t allow it to overcook!).  Add any peppermint powder* you have sifted out of the candy cane pieces if desired. 

Pour melted white chocolate onto prepared pan. Using icing spatula, spread chocolate to fill pan. Sprinkle with some of the crushed candy cane pieces (no more than half…you can decide how much/little you want). Chill in the refrigerator until set, about 15 minutes.

In a different microwave safe bowl, combine bittersweet chocolate and cream.  Melt chocolate using the same method as the white chocolate.  Add peppermint extract and cool to barely lukewarm, about 5 minutes. Pour bittersweet chocolate mixture in long lines over white chocolate in the pan. Using icing spatula, spread bittersweet chocolate in even layer. Refrigerate until very cold and firm, about 25 minutes (or more).

In the same “white chocolate bowl” as before, melt the remaining white chocolate using the same method.  Allow to cool slightly (if it is too hot, when added to the pan the bittersweet chocolate will melt too easily and the bark will looked swirled).  Pour white chocolate over firm bittersweet chocolate layer and CAREFULLY spread to cover. Immediately sprinkle with remaining crushed candy cane pieces. Chill just until firm, about 20 minutes (or overnight).

Lift foil with bark onto work surface. If chilled overnight, allow the bark to warm up slightly (so it will cut better). 

Cut bark crosswise into 2-inch-wide strips. Using metal spatula, slide bark off foil and onto work surface. Cut each strip crosswise into 3 sections and each section diagonally into 2 triangles (only if you want to be that detailed…I wasn’t so precise…I like the “homemade” look of irregular sized pieces). 

Can be made 2 weeks ahead. Chill in airtight container.

* I put the candy canes in a zip-top bag and crushed them with a rolling pin.  I then sifted the "peppermint powder” and added it to the first white chocolate layer.  Some of my pieces were to big for my liking.  So I repeated the process and actually added the new powder to the dark chocolate layer (I can’t waste anything!).  I also didn’t use all the candy cane pieces because I thought it would be too much…so I guess I did waste after all!

Friday, December 10, 2010

Best Banana Bread

So it’s finally official…I now have the necklace to prove it…I was part of the Saints’ Super Bowl winning season.  I’m thinking I need a second one to keep it company – Two Dat?!?

PC081835

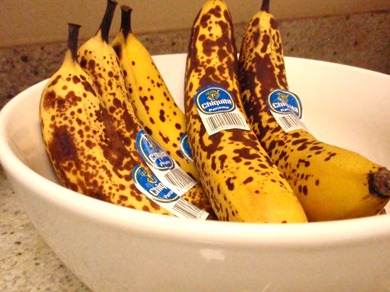
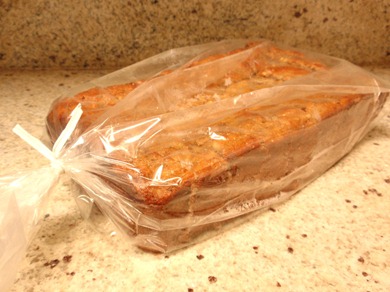
Just had to show off a little…the real topic at hand, Banana Bread.  Hilary’s roommate’s dad works for Chiquita and they always have a surplus of bananas at the house.  Last month I inherited a box of them, and after sharing some with Jess and using a few for banana oatmeal, I still had a lot leftover.  When life gives you bananas, make banana bread!
PB231798

PB231814

I never throw old bananas away.  There is a bag in my freezer where all those past their prime are destined.  While overly brown bananas are not good for eating out of hand, they are perfect when you want a strong banana flavor to shine in a recipe…for me that usually means banana smoothies and banana bread.

PB231816 PB231817 

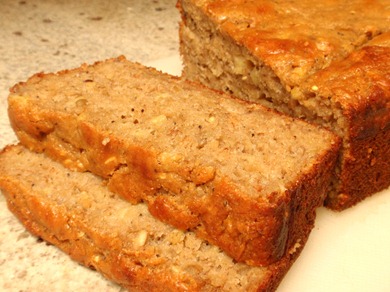
If made the right way, banana bread can be both moist and low fat…why??  Because the bananas are used to replace a lot of the fat (and sugar) in a standard quick bread recipe while keeping it from becoming dry and crumbly (the same can be done with applesauce and pumpkin).  Beware, however, this is not always the case*.

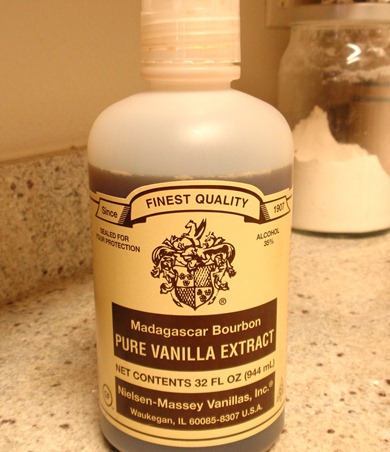
Things that make this the “best” banana bread?  Good vanilla extract (I sound like Barefoot Contessa), moistness from the yogurt, and the peace-of-mind knowing it’s healthy (thanks to the bananas and whole wheat pastry flour…I also add 1/2 a cup of King Arthur Harvest Grains blend). 

PB231825

By the way, this huge bottle of extract (32 oz) is an INCREDIBLE deal…it will last you forever and it is better than the imitation extract they sell in the grocery.

PB231821 PB231826  PB231829

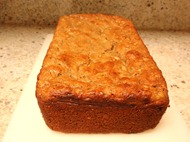
This bread is so delicious you will want to eat it for dessert and so healthy you won’t feel guilty eating it for breakfast.  Perfect either way with an ice cold glass of milk (or milk with ice in it if you are me!). 

PB231833

Best Banana Bread
adapted from The Fresh Loaf

Makes 12 servings

1 cup whole wheat (pastry) flour
1 cup all purpose flour
3/4 teaspoon salt
1/2 teaspoon baking soda
1/4 teaspoon baking powder
1/2 teaspoon cinnamon
1/8 teaspoon nutmeg (go easy on it so it doesn’t overpower the banana flavor)

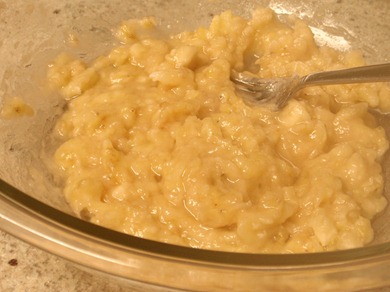
1 1/2 cups mashed bananas (about 3 large(
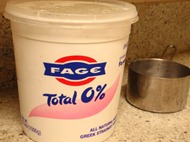
1 cup Greek fat free yogurt
1/2 cup brown sugar
3 tablespoons butter, softened
2 eggs
1 tablespoon vanilla extract

Adjust oven rack to lower middle position and heat oven to 350 degrees. Grease a 9-by-5 inch loaf pan; set aside (I use a piece of parchment in the bottom as well). Combine dry ingredients together in large bowl; set aside.

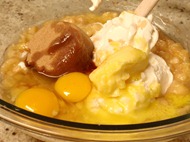
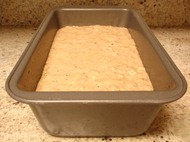
Mix wet ingredients together in a medium bowl. Lightly fold banana mixture into dry ingredients with rubber spatula until just combined and batter looks thick and chunky. Scrape batter into prepared loaf pan; bake until loaf is golden brown and toothpick inserted in center comes out clean, about 55 minutes. Cool in pan for 5 minutes, then transfer to wire rack. Serve warm or at room temperature.

I slice mine and then freeze the individual slices…so I don’t eat it all at once :)

Per serving (1/12th of the loaf): 162 calories, 4 g fat (2.2 g saturated), 26 g carbohydrates, 2 g fiber, 9 g sugar, 5 g protein; Exchanges: 2 starch, 1/2 fat

* Compared to Banana Nut Loaf from Starbucks: 490 calories, 19 g fat, 75 g carbohydrates, 4 g fiber, 7 g protein

Or their Reduced-fat Banana Chocolate Chip Coffee Cake: 390 calories, 7 g fat, 79 g carbohydrates, 3 g fiber, 5 g protein

Even if you cut my loaf into 10 slices it’s still only 195 calories and 5 g fat

Monday, November 22, 2010

Water and Weight Loss

I just read this article and found it interesting…

Apparently there is now research backing the idea that “filling up” on water before a meal can help you lose weight.  Maybe you can test it out on yourself this Thursday!  Report back with your findings!

Deliciously Golden…on TV!

Last Thursday I filmed a TV segment for the show Across Louisiana on the local Cox station.  The topic?  Healthy holiday eating of course!  The show will air on channel 4 each morning this week at 8:00 am.  If you can’t tune it, here's a recap of what I covered:

1.  The week of Thanksgiving try to eat “extra healthfully” at all the meals YOU have control of…the ones you eat at home or by yourself.

2.  The day of Thanksgiving, eat breakfast (and lunch if you have Thanksgiving at dinner).  Skipping a meal will only make you hungrier and then you will end up overeating.  For me? I’ll either have yogurt and fruit or oatmeal with fruit and milk (fiber/carbs & protein).  We eat our Thanksgiving meal at noon.  Then I’ll have a light dinner…salad most probably!

3.  At the meal, choose the food that you can’t have on a regular basis and the items that you love.  Skip the everyday dishes…for me that’s mashed potatoes and gravy…I can have that whenever I want.  But if you love mashed potatoes and gravy with your turkey, then go for it, and pass on something else.  Load up on the lean, protein packed turkey and any fresh vegetables that there might be.

4.  Keep portions small.  Serve yourself a “taste” of everything.  You can always go back for seconds.  But, If you put it on your plate you will more than likely eat it…ALL of it! 

5.  Offer to bring a lighter side dish.  A non-casserole vegetable!  I’m the salad girl at all family holiday meals.  That way I know that there will be a healthy, delicious side item that I can fill my plate with. 

6.  If you love dessert, then SAVE room for it.  During the main part of the meal, don’t go back for seconds or pass on the store bought dinner rolls…and then enjoy your dessert!

7.  Get back on track.  The NEXT day.  Don’t wait until Monday to end the holiday eating. 

Remember, holiday weight gain doesn’t happen because of one meal…its the combination of lots of “holiday” meals/snacks/treats.  Here’s an old post on holiday eating.  Happy Thanksgiving!

Friday, November 12, 2010

Nana’s Beef Vegetable Soup

Beef Vegetable Soup 2

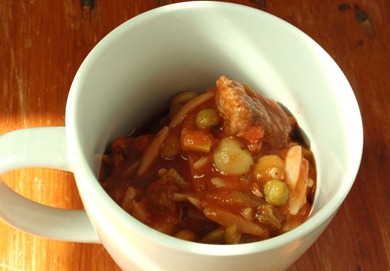
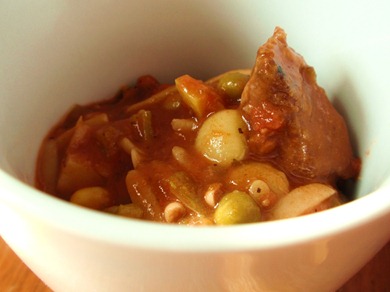
Around this time of year my mom’s mom, Nana, would get to work making a HUGE batch of her delicious beef and vegetable soup.  In her words “it grows” as you make it…she told me once that she kept having to change pots to accommodate all the veggies she wanted to add. 

PB121767

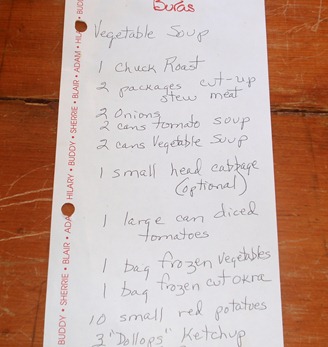
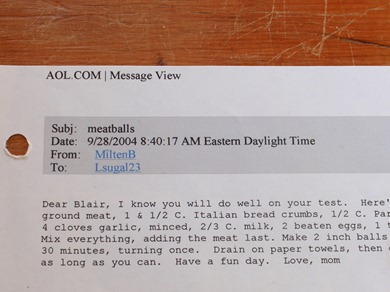
I have lots of family recipes…a whole binder dedicated to them.  Most of my “Nana recipes” are in her handwriting on a scrap of paper.  On the other hand, many of my mom’s recipes are in the form of an email that I printed out…I only have 1 or 2 in her handwriting.  I love the fact that the text of the message reminds me of being in college and are signed love, mom: “I know you will do well on your test”…I must have been planning a post-test celebratory meal of spaghetti and meatballs.

PB121771

Back to the soup.

Nana would bring containers of soup to our house, some to eat right away and some to freeze.  But these weren’t your typical Tupperware containers.  No!  Nana saved jars and plastic containers to use for occasions like this.  It was completely normal to receive a Cool Whip container or a Blue Plate jar full of soup (these types of containers also found their way to Thanksgiving dinner to package leftovers after the meal).

I loved this soup as a kid.  The beef was undoubtedly the best part.  My brother, sister, and I would fish it out of the pot, giving ourselves double servings of meat…same with the potatoes.
  PB051749 PB051753 PB051755

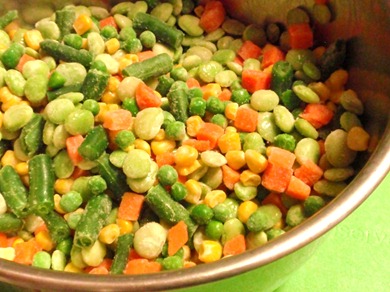
But really, I loved all the veggies too.  My version today has an even greater variety of vegetables (does that surprise anyone?).  I also played with the method a little and made a few changes to the tomato ingredients (she used canned tomato soup and canned vegetable soup…but I switched to diced & pureed – less processed!).  Browning the beef first was also a must for the added flavor from the caramelized bits left on the bottom of the pan.

But some things I didn’t dare mess with.  Nana added “dollops” of ketchup right at the end of cooking…so do I.  Nana added pasta…me too!  I’ve never tried adding a head of cabbage which she says is optional…maybe next year. 

 PB051757 PB051759

Like I said, this makes a ton of soup (the amount changes every time I make it…this batch made 36 cups!).  But it’s a flexible/forgiving recipe…add as much as or as little as you want.  Double the recipe or halve the recipe.  Any combination of fresh or frozen veggies will do perfectly.  You could leave the beef out (definitely wouldn’t recommend it though), or switch to chicken.  You could omit the pasta.   You could add fresh diced carrots with the onions and celery (my carrots were in the frozen veggie mix).  You could reduce the amount of potatoes and only do 1 pound.  Fresh herbs would be nice too…my herb garden bit the dust when I moved into an apartment. 

Just note, you will need to adjust the broth and water accordingly.  I leave mine a little thick (almost stew like) so that I have less to freeze…and then add water before reheating.

Beef vegetable soup 1

Nana’s Beef Vegetable Soup
adapted from my grandmother’s recipe

1 chuck roast, trimmed of fat and cubed (2-3 pounds)
2 tablespoons flour
3 tablespoons of a neutral oil (grapeseed, canola)
1 onion, diced
1 green bell pepper, diced
5 celery stalks, diced
3 garlic cloves, minced
1 tablespoon salt, divided
2 teaspoons black pepper, divided
4 cups chicken broth (reduced sodium)
4 cups beef broth
4 cups water*
2  26oz cans tomato puree
1  26oz can diced tomatoes
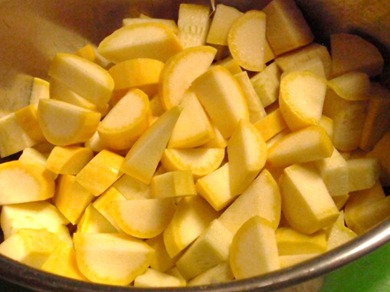
2-3 zucchini or yellow squash, cubed
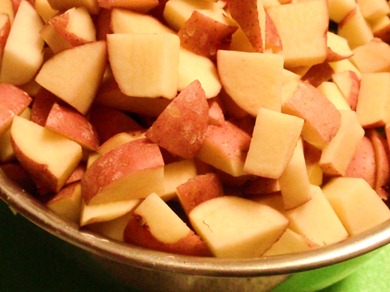
2 lb small red potatoes, cubed
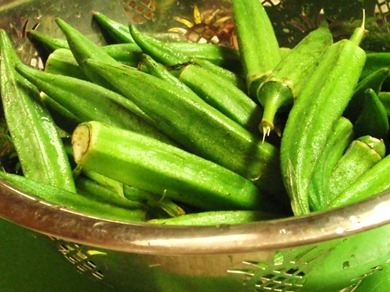
16 oz bag frozen okra**
16 oz bag frozen mixed vegetables (corn, carrots, green beans, peas)
16 oz bag frozen baby lima beans
2 teaspoons dried thyme & 2 teaspoons dried oregano (1 tablespoon of Italian seasoning would work as well)
2 cups whole wheat orzo, uncooked (or any pasta you like)
3 generous “dollops” of ketchup

In a bowl, toss beef cubes and flour until well coated.  Heat 1 tablespoon of oil in a large stock pot over medium high heat.  Add 1/3 of the beef to the pot and cook until browned on all sides.  Transfer to a paper towel lined plate.  Repeat twice more, each time with 1 tablespoon oil and 1/3 of meat.  Reduce heat if browning to quickly.

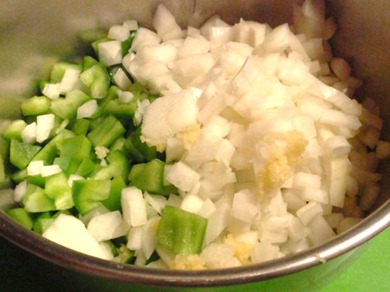
In the now empty pot, add onions, bell pepper, celery, garlic, 1 1/2 teaspoons salt, and 1 teaspoon pepper.  Stir, scraping up the browned bits from the bottom of the pan.  Reduce heat to medium, cover, and cook for 20 minutes, until vegetable are very tender; stir occasionally.

Add both broths and water.  Return beef to the pot and simmer on low heat for 1 hour.

Add all cans of tomatoes.  Add remaining vegetables (fresh and frozen).  Season with remaining salt (1 1/2 teaspoons), pepper (1 teaspoon), thyme and oregano.  Cook over medium heat for 1 hour, or until beef and potatoes are very tender.  Add more water if soup becomes too thick or if all the vegetables aren’t submerged.

Add orzo and ketchup.  Cook for about 20 minutes or until pasta is al dente.  Taste and reseason with salt and pepper if necessary.

Per serving (1 cup*) – 183 calories, 7 g fat (2.5 g saturated), 20 g carbohydrates, 4 g fiber, 11 g protein, 518 mg sodium (exchanges: 2 vegetable, 1 starch, 1 protein, 1 fat; WW points: 3)

* The soup will be really thick, almost stew-like (the annoying Rachael Ray would call this stoup)…I do this on purpose because I freeze the soup “concentrated” which helps with freezer space and then add water when I reheat it.  It’s good both ways (thick and thin), but if you add the water, your 1 cup serving can become nearly 2 cups…for the same amount of calories.  And a tip…the potatoes for some reason will be mushy if you reheat in the microwave (after being frozen), so I use the stovetop which seems to reduce the mushiness.

** I used fresh okra in this batch, but usually use frozen…both are equally delish.

Monday, November 01, 2010

All Saints Day

I love when the first of the month falls on a Monday…it feels like such a fresh start…perfect opportunity for someone to get back on track (in more than one way). 

Someone (me) had a party filled weekend, which means lots of “party” food and beverages.  And I may or may not have had a Rally’s burger (w cheese…and fries!) last night after the Saints win over the Steelers…that is what exhaustion does to me! 

But today is the first and I’m about to head to the grocery so I can fill my fridge with healthy things and starting today I can get back on track (and feel better…fast food makes me feel sick!).  And I’m going to mass…fresh start number 2.

It’s All Saints Day, the day my mom passed away 6 years ago.  Time flies, but then again, it doesn’t.  It seems like forever ago on that Saturday night in Tiger Stadium where I saw her for the last time as I marched out with the GG’s.  The next night was Halloween and that was the last time I talked to her.  Seems like a lifetime ago…

atlantic city

Here is the post I wrote 2 years ago remembering her “food” influences.  And all other posts where I mention her for one reason or another.

Chicken Salad
Mother’s Day
Spaghetti Sauce
Spice Cake

I miss my mom everyday, but thankfully she still has a huge influence on my life.  This was written on her online “remembrance book”, I love this story…so true:

While the services for Sherrie were being held, one of the mourners was having difficulty with his leg while in church. He went outside of St. Peter's church so that he could not disturb others. As he stood in front of St Peter's Church a student from St. Peter's school was driving by with his mother. The mother stopped the car so the young man could go and ask why there were so many cars in all directions. The young boy asked the gentleman, "Is this a funeral?" to which the gentleman replied, "Yes." Then the young man asked, "Was it a celebrity?" The gentleman replied, "Yes"!

Thursday, October 14, 2010

Spiced Apple Cake

apple cake 1

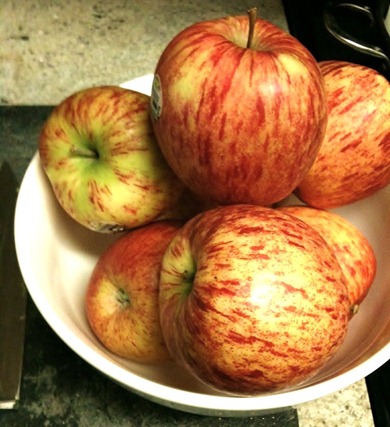
I have an apple obsession…or so I’ve been told…I eat one just about everyday.  Not necessarily because apples are my favorite fruit (although I do love them), but because of their convenience.

What other fruit can you throw in your bag/purse that won’t get damaged and you don’t have to peel?  It’s a running joke that I always have an apple (or 2) in my purse.

apple cake 5

Apples are easy to find, relatively cheap (especially right now because it’s apple season), and there is a huge variety that all taste different.  I love pink ladies and honeycrisps.  That’s what I usually buy (unless some other variety of organic apple is on sale at WF…this week I’m enjoying galas at $1.49/lb).  I love a sweet, slightly tart crisp apple…no granny smiths for me, they are too tart!  I prefer red apples.  And I can’t stand when they are mealy or soft.  Which is the exact reason I love pink lady and honeycrisp apples…I’ve never had a bad one!

When I was little I loved when Bernie would peel and slice my apples.  But now being the health-conscious girl that I am, I eat the skin.  I usually eat apples raw, but sometimes I microwave diced apple with a little cinnamon and sugar for a warm apple treat.

apples

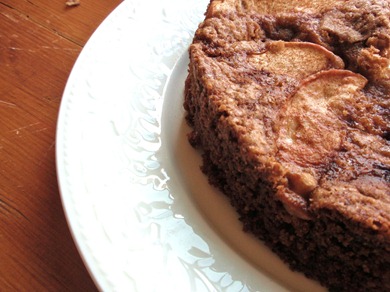
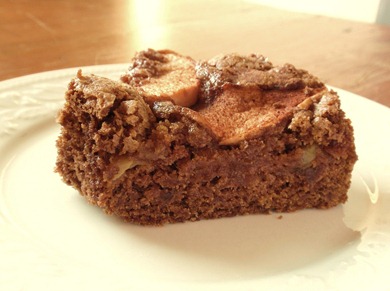
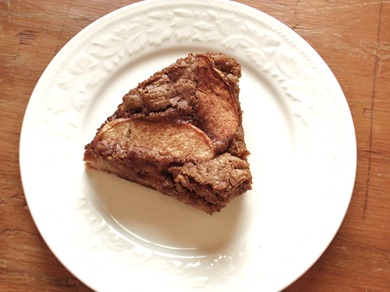
And then there is this apple cake from the Williams-Sonoma New Healthy Kitchen cookbook.  It’s flavor of warm spices pair perfectly with the apples which melt and all but disappear into the batter.  And what else could be more appropriate for dessert (or breakfast) with the fabulous cool weather we are being spoiled with here in Louisiana?

Hil says it’s not as good as mom’s spice cake, but then again, she likes macaroni from a box too.  Try it for yourself…it might be the start of your own apple obsession.

apple cake 3


Spiced Apple Cake
adapted from Williams-Sonoma New Healthy Kitchen

makes 10 servings

2 large (or 3 medium) apples*
1 cup granulated sugar 
1 stick (1/2 cup) unsalted butter, melted
1 egg
1 teaspoon vanilla
1 1/4 cups all-purpose flour
1 teaspoon baking soda
1 teaspoon cinnamon
1/4 teaspoon freshly grated nutmeg
1/4 teaspoon allspice
1/2 teaspoon salt 
1 tablespoons granulated sugar mixed with 1/2 teaspoon cinnamon

Preheat the oven to 325°F. Butter and flour an 8-inch round cake pan (I used an angel food tube pan).  Quarter, core, and thinly slice the apples, leaving the skin intact.

In a bowl, whisk together the granulated sugar, butter, egg, and vanilla. Stir in two-thirds of the apple slices.

In a separate bowl, sift together the flour, baking soda, cinnamon, nutmeg, allspice, and salt. Add the flour mixture to the sugar mixture stirring until just blended.

Pour the batter into the prepared pan and smooth the top. Arrange the remaining apple slices in a pattern on top, pressing them gently into the batter. Sprinkle with the cinnamon sugar.

Bake until the cake is golden and springy to the touch, and a toothpick inserted in the center comes out clean, about 50 minutes.

Transfer the pan to a wire rack and let the cake stand in the pan for 10 minutes, then turn the cake out onto the rack and let cool completely, about 2 hours. Cut into wedges to serve.

* You can use any type of apple that is in season…the cake will taste slightly different every time, but it will always be moist and delicious. 

Per serving (1/10 of cake) – 250 calories, 10 g fat (6 g saturated), 40 g carbohydrates, 2 g fiber, 2 g protein (exchanges: 2 starch, 2 fat; WW points: 6)

As a comparison…Betty Crocker’s Spice Cake

Per serving (1/10 of cake) – 324 calories, 16 g fat (4 g saturated), 42 g carbohydrates, 0 g fiber, 5 g protein

Tuesday, October 05, 2010

Split Pea Soup

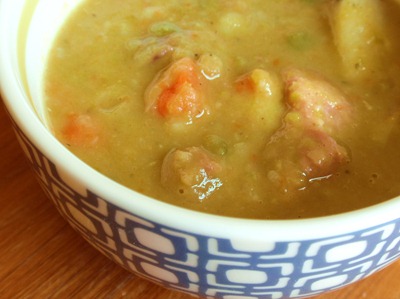
Split Pea Soup 1 When I first moved to Houston in 2007, there were many things about Louisiana that I missed.  My family and friends, the studio, a home cooked meal (cooked by someone other than myself).  It was a similar experience when I moved to college (although this was just a 1 hour trip home…not the long 4 hour drive from Houston). 

I remember the feeling of pulling up in my parents driveway  my first year of college…my mom would be in the kitchen cooking something…something that I couldn’t wait to eat! 

But for a whole year in Houston this feeling was few and far between.  Until Jill move home, that is.  Jill, one of my mom’s best friends, and her family had been in Malaysia for 7 years.  But while I was still living in Houston, they returned home and began satisfying my craving for home-cooking.

Split Pea Soup 2Jill is a great cook.   And she has the most incredible cookbook collection…really…it’s like visiting a library of nothing but cookbooks.  So not only was I now getting home cooked meals, I was also able to “check-out” new cookbooks from her library.  But it gets better…she would always send me home with leftovers.  LOVE!

Jill was the first person to introduce me to this split pea soup.  I don’t remember if she made too much (probably) or didn’t like it (there’s no way…its too good), but I ended up with a lot of soup.  Into the freezer it went (in small individual servings).  Perfect for when I got home late at night from teaching dance, dancing, or working at LifeTime

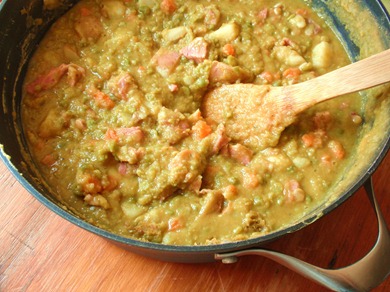
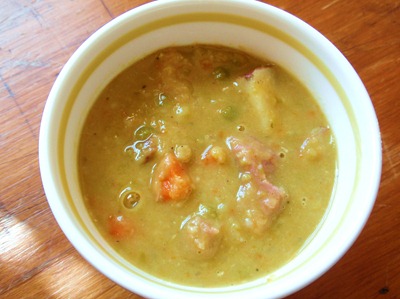
I love split pea soup.  It reminds me of my mom.  And the fall…and since we are having the most AMAZING fallish weather, I figured it was the perfect occasion to make it myself.  But just so you know, this isn’t your ordinary split pea soup…the addition of potatoes, carrots, and in my version ham, really elevates the soup to a whole new level.  Make a lot (maybe double it if you aren’t cooking for one like me) and freeze it…you won’t be sorry!
  Split Pea Soup 3

Split Pea Soup
adapted from Ina Garten

makes about 9 1-cup servings

1 large onion, chopped
3 cloves garlic, minced 
2 tablespoons olive oil
1/2 teaspoon dried oregano
1-1/2 teaspoons kosher salt (not as much if just using regular salt
1 teaspoon black pepper
2 cups medium-diced carrots (3 to 4 carrots)
1 cup medium-diced red boiling potatoes, unpeeled (3 - 4 small)
1 pound dried split green peas, divided
8 cups chicken stock or water
1 ham hock, optional…but good!

In a 4-quart stockpot over medium heat, sauté the onions and garlic with the olive oil, oregano, salt, and pepper until the onions are translucent, 10 to 15 minutes. Add the carrots, potatoes, 1/2 of split peas, chicken stock (and/or water), and ham hock. Bring to a boil, then simmer uncovered for 40 minutes. Skim off the foam while cooking.

Add the remaining split peas and continue to simmer for another 40 minutes, or until all the peas are soft*. Stir frequently to keep the solids from burning on the bottom.

Remove ham meat and bone from pot and set aside.  When ham is cool enough to handle, shred meat into bite-sized pieces, discarding bone and fat.

Return shredded ham to the pot.  Taste for salt and pepper. Serve hot.**

* Some of the reviews on the Food Network website complained that some of the peas were still crunch…the point of adding them in 2 batches is to have some of the peas turn to mush and some to retain their shape, but NOT to be crunchy.  Make sure you cook them long enough after the last addition.

** The finished soup will continue to thicken as it stands but can be thinned with some water when reheated.  You will definitely need to do this when reheating any frozen soup.

Per serving (based on 9 1-cup servings per recipe) – 316 calories, 6 g fat (1.5 g saturated), 41 g carbohydrates, 15 g fiber, 25 g protein (exchanges: 3 protein, 2 starch, 1 vegetable, 1 fat; WW points: 6)

Monday, September 20, 2010

Asian Mushroom Quinoa

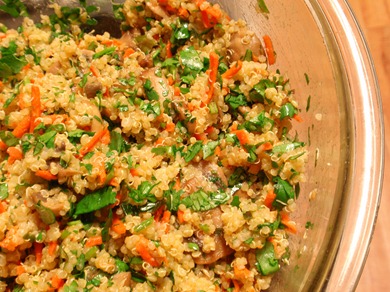
P9081659
I make a lot of recipes that I don’t share with you…either because they aren’t anything special or I figure most people wouldn’t be interested.  For example, I make a lot of grain salads.  Some type of whole grain mixed with a combination of veggies, fruit, herbs, nuts, and protein all tossed together with a vinaigrette.  And of course I eat it over a bed of lettuce…instant salad!  But I’m not sure the average person would care enough to read about these impromptu recipes.

Sometimes I use bulgur as my grain (the grain in tabbouleh).  Or wheatberries.  Or wild rice.  Other times I’ll use a small whole grain pasta (Israli couscous or orzo).  Lately its been quinoa.  I bought a HUGE bag of quinoa at Costco in Houston for SO CHEAP!  And now I’m using it all the time (and I still haven’t even made a dent in the bag).

I didn’t taste quinoa until I switched majors in college from pre-med to nutrition.  In my first cooking course we prepared this strange grain.  I don’t remember what I though about it…but it didn’t turn me into a quinoa eater.  Maybe because back then it wasn’t readily available in the grocery?

Years later living in Houston, I began my transformation into a foodie…I fell in love with Central Market and Whole Foods.  Two places that sold a prepared quinoa salad.  And I was hooked. 

But would I be able to convince others of the deliciousness of this grain?  Maybe if I told you how healthy it is?  And that it’s high in protein?  Or if I found an incredible recipe with flavors and ingredients that would make you eat ANYTHING…

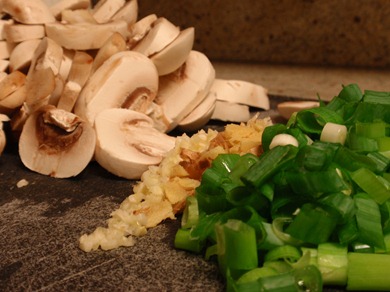
P9081653

That is the case here.  I think this combination of ingredients…onions, garlic, ginger, soy sauce, cilantro, mushrooms, cashews, lime juice…would be good on ANYTHING.  And for all you meat eaters (Adam) you could add chicken or shrimp or even steak.

So if you don’t want to be adventurous and try quinoa, make this recipe anyway and substitute with a small shaped pasta…preferably whole grain.

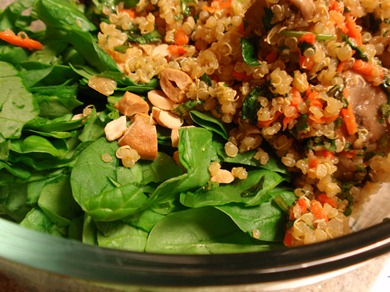
 P9081661


Asian Mushroom Quinoa
adapted from Latimes.com

1.5 cups quinoa
3 cups water or stock, or a combination of both
Salt
1 tablespoon neutral-flavored oil (canola, grapeseed)
1 inch of fresh ginger, peeled and grated/minced
4 cloves of garlic, thinly sliced
12 ounces sliced fresh mushrooms (shitake, button, cremini)
1 cup sliced green onions, both white and green parts (about 1 small bunch)
1 tablespoon fish sauce (optional, but recommended)
1 tablespoon soy sauce
1 tablespoon rice wine vinegar
2 carrots, shredded (about 1 cup)*
1 bunch of fresh cilantro, leaves minced
Finely grated zest and juice of 1 lime
2 teaspoons sesame oil
1/2 cup cashews, toasted and chopped

Rinse the quinoa in a fine-mesh strainer under cool running water, then drain well (the grains are very small and will slip through a coarse strainer).

Heat a large saucepan over medium-high heat and add the quinoa.  Toast the quinoa, shaking the pan frequently, just until the grains dry, are just beginning to color and have a nutty aroma, about 4 minutes.
Add water or stock and a good pinch of salt and bring to a boil over high heat. Reduce the heat to a simmer and cover. Cook the quinoa until the grains are translucent and tender and the germ has spiraled out from the grain, 12 to 15 minutes (be careful not to overcook). Remove from heat and set aside to cool.

Meanwhile, heat a wok or large skillet over high heat. Add oil and heat until it just begins to simmer. Stir in the garlic and ginger and fry, stirring constantly, just until the garlic is golden, about 30 seconds (the garlic can burn quickly).

Add the mushrooms stir-fry until caramelized, 4 to 5 minutes. Stir the green onions in with the mushrooms and continue to stir-fry just until the green onions begin to wilt, 1 to 2 minutes.

Add the fish sauce (if using), soy sauce, and vinegar to the mixture and stir or toss to combine, then remove from heat.

In a large bowl, gently toss the quinoa and carrots  with the warm shiitake-green onion mixture.  Add the cilantro, lime zest and juice, sesame oil, and cashews. Season to taste with additional salt if desired and serve immediately.  If not serving immediately don’t add the cashews…they get soggy!

Per serving (about 1 cup or 1/8 of the recipe) – 219 calories, 9 g fat (1 g saturated), 28 g carbohydrates, 4 g fiber, 8 g protein  (exchanges: 1.5 starch, 1 vegetable, 2 fat; WW points: 4)

* I actually used leftover pickled carrots the first time I made this

Friday, September 10, 2010

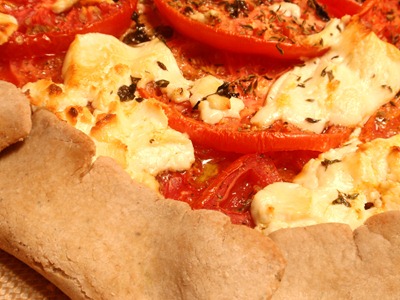
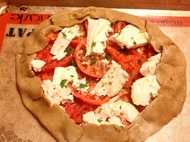
Tomato Goat Cheese Tart

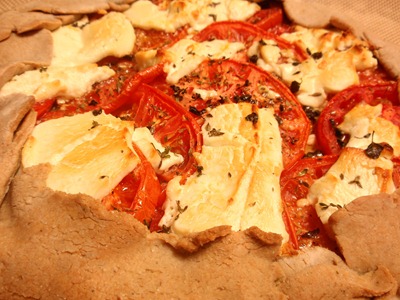
Tomato Goat Cheese Tart
This recipe was sure to be a winner from the start…how can you go wrong at the peak of tomato season (I made this a while back) with a dish that has both tomatoes and goat cheese?  You can’t! 
David Lebovitz, thank you so much for inspiring this meal.  
P8111617
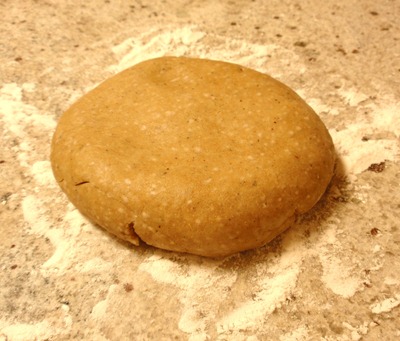
Now, I could have bought a pie crust from the store or I could have followed his recipe…but I wanted to up the nutrition factor a little with a whole wheat crust.  I’ve had a whole wheat olive oil crust bookmarked for a while now.  And as much as I hate to admit it…I’ve NEVER made a homemade pie crust before…I know!  It’s practically a sin!  So I went with homemade and healthy over convenience…but on a day when I’m in a time crunch I wouldn’t hesitate to use a store bought crust…not very often though…have you seen the ingredient list?  Not so great…
Ingredients: Enriched Flour Bleached (Wheat Flour, Niacin, Ferrous Sulfate, Thiamin Mononitrate, Riboflavin, Folic Acid), Partially Hydrogenated Lard With Bha and Bht Added to Protect Flavor, Wheat Starch, Water, Contains 2% Or Less of: Salt, Rice Flour, Potassium Sorbate and Sodium Propionate (Preservatives), Xanthan Gum, Citric Acid, Yellow 5 and Red 40.
 P8111620P8111624  P8111628 P8111629
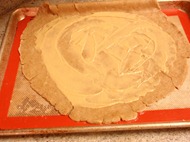
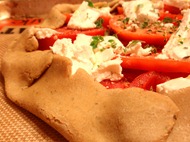
The crust came together easily in the food processor (here’s a method for doing this…I didn’t follow this recipe though).  I’ll admit, when rolling it out it was a little tricky to work with…as you can see in the pics, the edges kept cracking.  Getting it onto the Silpat/parchment lined baking sheet was difficult too.  And while I liked the flavor, the texture was a little dry.  I’ll have to keep working on the “healthier pie crust” recipe.  Until then, I recommend going with store bought or your own tried and true crust recipe.

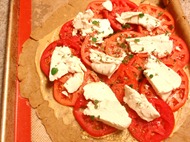
I decided on a free form tart.  I don’t have a tart pan…and free form is so easy!
P8111630P8111637
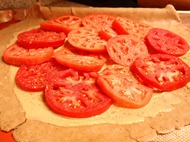
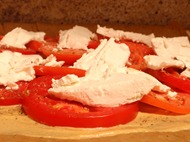
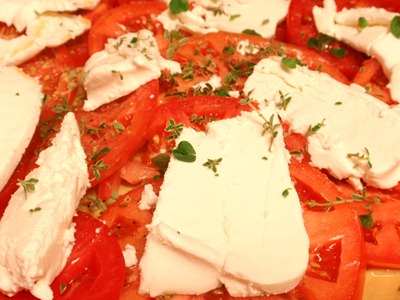
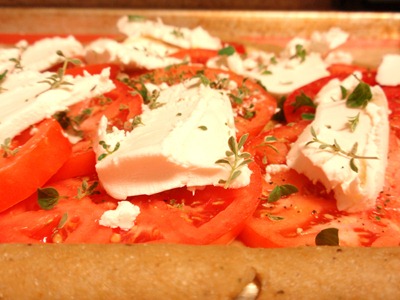
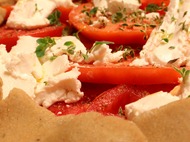
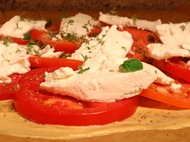
The filling on the other-hand was incredible.  Dijon mustard provided a subtle background tang to the dominate flavors of the tomatoes (which I pressed on tea towels to remove some of the liquid and seeds) and goat cheese.  Freshly picked thyme and oregano added a final pizza like aroma.

Goat cheese (and generally other soft cheeses) are lower in fat.  And because it’s a tart you are only using 1 pie crust.  So the calorie/fat content of 1 serving (1/6 of the recipe) isn’t bad.  Serve it with a healthy side (a mixed green salad with a light dressing) and you are in for a great meal.
P8111638 P8111639  P8111642 P8111643
All I can say is you should make this before tomato season becomes only a memory in the past…bland out-of-season supermarket tomatoes will not do this recipe justice!
Tomato Goat Cheese Tart  
Tomato Goat Cheese Tart
 
adapted from DavidLebovitz.com and Chocolate and Zucchini…2 of my favorite blogs

Makes 6 – 8 servings…serve with a green salad to make it a more filling meal
One unbaked tart/pie crust (homemade using your own tried and true recipe or store bought…or you could use the recipes included here…until I revamp the whole wheat olive oil version)
Dijon or whole-grain mustard
2-3 large ripe tomatoes, sliced into 1/4 inch rounds and drained/pressed on paper towels to remove some of the seeds/juice
salt and black pepper
two generous tablespoons chopped fresh herbs, such as thyme, oregano, basil, chives, chervil, or tarragon 
4 ounces goat cheese, sliced into rounds

Preheat the oven to 425ºF*.

Place pie crust on baking sheet lined with parchment or a Silpat.

Spread an even layer of mustard over the bottom of the tart dough, leaving a 2 inch border on all sides.  Allow it to sit a few minutes to dry out.

Arrange tomatoes over the mustard in a single, even layer.

Sprinkle with some of the chopped fresh herbs, then arrange the slices of goat cheese on top. Add the remaining fresh herbs.  Gather the edges and fold them over to envelope the filling.

Bake the tart for 30 minutes* or so, until the dough is cooked, the tomatoes are tender, and the cheese on top is nicely browned. Depending on the heat of your oven, if the cheese doesn’t brown as much as you’d like it, you might want to pass it under the broiler…I did!

* It is recommended that you cook the tart in a very hot oven. You might want to check the tart midway through baking and turn it down a bit in case the top is getting too dark, before the crust and tomatoes appear to be cooked.

Per serving (based on 6 servings per recipe) – 214 calories, 14 g fat (5 g saturated), 16 g carbohydrates, 2 g fiber, 6 g protein (exchanges: 1/2 protein, 1 starch, 1/2 vegetable, 3 fat; WW points: 5)